Body measurement charts are fundamental tools for achieving well-fitting‚ professionally-looking garments. These charts‚ often available as PDF downloads‚ provide a standardized guide for determining your unique body dimensions.
Accurate measurements are the cornerstone of successful sewing projects‚ eliminating guesswork and minimizing the need for alterations. Utilizing a chart ensures patterns align with your form.
What is a Body Measurement Chart?
A body measurement chart for sewing is a detailed table listing the various circumference and length measurements of the human body. Typically found as a PDF document for easy printing and reference‚ these charts go beyond simple sizes like Small‚ Medium‚ or Large. They provide specific numbers – in inches or centimeters – for areas like bust‚ waist‚ hips‚ shoulder width‚ and inseam.
These charts aren’t one-size-fits-all; they are designed to be a starting point. Different manufacturers and pattern companies may have slightly varying charts. A good PDF chart will often include instructions on how to accurately take each measurement‚ ensuring consistency. The goal is to translate your three-dimensional body into two-dimensional pattern pieces‚ leading to a garment that fits comfortably and looks its best.
Why Use a Body Measurement Chart for Sewing?
Utilizing a body measurement chart‚ often conveniently downloaded as a PDF‚ is crucial for successful sewing. Relying on ready-to-wear sizes alone is often inaccurate‚ as sizing varies significantly between brands. A chart allows for personalized pattern selection‚ ensuring a better fit tailored to your unique body shape.
PDF charts minimize costly mistakes and wasted fabric. Accurate measurements reduce the need for extensive alterations‚ saving both time and money. They empower you to create garments that flatter your figure and provide a comfortable‚ confident fit. Furthermore‚ understanding your measurements helps when adapting patterns or even drafting your own designs‚ fostering creativity and control over your sewing projects.

Essential Measurements for Sewing
Key measurements—bust‚ waist‚ hips—form the foundation of garment construction. PDF charts guide accurate data collection‚ ensuring patterns align with your body’s unique proportions.
Bust Measurement
The bust measurement is crucial for garments like tops‚ dresses‚ and jackets‚ directly impacting fit and comfort. When taking this measurement‚ wear a well-fitting‚ non-padded bra – your everyday bra is ideal. Stand naturally‚ with arms relaxed at your sides.
Using a flexible measuring tape‚ wrap it around the fullest part of your bust‚ ensuring the tape is level all the way around your body. Don’t pull the tape too tightly; it should be snug but not constricting. Referencing a body measurement chart PDF will help you understand where this fullest point typically lies.
Record the measurement in inches or centimeters‚ depending on the chart’s format. It’s important to note whether the chart requires a full bust measurement or a half bust measurement‚ as this will affect pattern selection. Accuracy is paramount for achieving a flattering and comfortable fit.
Waist Measurement
Determining your waist measurement accurately is vital for achieving a flattering silhouette in skirts‚ pants‚ and dresses. Locate your natural waistline – this is typically the narrowest part of your torso‚ or where your body bends when you side-bend. A body measurement chart PDF can visually aid in locating this point.
Stand relaxed‚ with your feet shoulder-width apart‚ and exhale normally. Wrap a flexible measuring tape around your natural waistline‚ ensuring it’s level all the way around. Avoid pulling the tape too tightly; it should rest comfortably against your skin. Record the measurement in inches or centimeters.
Pay attention to the chart’s instructions regarding whether to measure over clothing or directly against your skin. Consistency is key for accurate pattern selection. A precise waist measurement ensures garments fit comfortably and enhance your body shape.
Hip Measurement
Accurately measuring your hips is crucial for ensuring a proper fit in pants‚ skirts‚ and dresses. Locate the fullest part of your hips and buttocks – this is where you’ll take your measurement. A downloadable body measurement chart PDF often includes a diagram illustrating the correct placement.
Stand with your feet together and your weight evenly distributed. Wrap a flexible measuring tape around the fullest part of your hips‚ ensuring it’s level all the way around your body. Avoid pulling the tape too tightly; it should skim comfortably over your shape. Record the measurement in inches or centimeters.
Refer to the PDF chart’s guidelines regarding clothing – measure over lightweight clothing or directly against your skin for consistency. A correct hip measurement is essential for garments that drape and flatter your figure.
Shoulder Width
Determining your shoulder width is vital for achieving a well-fitted neckline and sleeve in shirts‚ jackets‚ and dresses. A body measurement chart PDF will typically illustrate the points between which to measure. Locate the bony prominence at the outer edge of each shoulder – these are your shoulder points.
Stand naturally with your arms relaxed at your sides. Using a flexible measuring tape‚ measure straight across your back from the outer edge of one shoulder to the outer edge of the other. Ensure the tape runs horizontally and isn’t curving with your back’s natural shape.
A precise shoulder width measurement‚ as detailed in the PDF chart‚ impacts the overall balance and comfort of your garment. It prevents sleeves from being too tight or gaping at the shoulders.
Back Width
Measuring back width is crucial for garments requiring a close fit across the upper back‚ such as fitted blouses‚ dresses‚ or tailored jackets. A reliable body measurement chart PDF will visually guide you through the process. This measurement isn’t the same as shoulder width!
Stand straight‚ maintaining a relaxed posture. Have someone assist you‚ or use a mirror. Locate the points where your armholes naturally fall on your back. Measure horizontally across your back‚ between these armhole points.
Keep the measuring tape level and snug‚ but not tight. Refer to your PDF chart for accurate interpretation. Correct back width ensures the garment doesn’t pull or feel restrictive across your shoulder blades.
Arm Length
Accurate arm length measurement is essential for sleeves that fit perfectly – not too short‚ nor too long! A detailed body measurement chart PDF will illustrate the correct starting and ending points for this measurement. This impacts the overall proportion of garments like shirts‚ dresses‚ and coats.
Start at the highest point of your shoulder (where a shirt seam would sit). With your arm slightly bent‚ measure down to your wrist bone. Keep the measuring tape aligned with the outer edge of your arm.
Ensure your arm is relaxed and not fully extended. Consult your PDF chart to understand if the measurement should be taken with your arm bent at a specific angle. This measurement dictates sleeve length and comfort.
Inseam Length
Determining your inseam length is crucial for well-fitting pants‚ shorts‚ and even skirts with linings. A comprehensive body measurement chart PDF will guide you through this process‚ ensuring accuracy. This measurement directly impacts the garment’s overall length and comfort‚ preventing dragging or restriction.
Stand with your feet shoulder-width apart. Measure from your crotch (the point where your torso meets your legs) down to where you want your hem to fall – typically the top of your shoe. Use a straight edge or have a helper ensure the tape measure follows a straight line.
Refer to your PDF chart for specific instructions‚ as some charts may specify measuring to the heel or a different point. Accurate inseam length is vital for a polished look!
Outseam Length
The outseam length is a key measurement for trousers‚ jeans‚ and skirts‚ influencing the overall silhouette and fit. A detailed body measurement chart PDF will illustrate precisely how to obtain this dimension accurately. It’s the total length along the side of the leg‚ from the waistline to the hem.
Stand straight with your feet together. Measure from your natural waistline (typically where you bend sideways) down the side of your leg to the desired hem length‚ while wearing shoes similar to those you’ll wear with the garment. Ensure the tape measure is taut but not constricting.
Consult your PDF chart for specific guidance‚ as variations exist. A correct outseam ensures proper garment proportion and a flattering fit!
Torso Length
Torso length is crucial for garments like dresses‚ jackets‚ and fitted tops‚ impacting where the waistline sits and the overall comfort of the fit. A comprehensive body measurement chart PDF will guide you through obtaining this measurement correctly.
To measure‚ locate the most prominent bone at the base of your neck (C7 vertebra). Measure from this point‚ down the center back‚ between your shoulder blades‚ to your natural waistline. A helper is recommended for accuracy. Ensure you stand straight and breathe normally.
Refer to your PDF chart for specific instructions and consider variations based on garment style. Accurate torso length ensures a flattering and comfortable fit‚ avoiding pulling or bunching!

Understanding Measurement Terminology
Decoding sewing terms within a body measurement chart PDF is vital for accurate pattern selection and garment construction‚ ensuring a perfect fit every time.

Ease Allowance Explained
Ease allowance represents the difference between your actual body measurements and the finished garment measurements‚ crucial when using a body measurement chart PDF. It’s the extra fabric incorporated into a pattern for comfort and movement.
There are different types of ease: wearing ease‚ for comfortable daily wear‚ and design ease‚ which contributes to the garment’s style and silhouette. A tight-fitting pattern will have minimal ease‚ while a looser style will incorporate more.
Understanding ease is vital because patterns aren’t cut to your exact body size. A PDF chart will give your body measurements‚ but you must select a pattern size accounting for the desired ease. Ignoring ease can result in clothing that’s too tight or overly baggy. Always check the pattern envelope or PDF instructions for the recommended ease allowances.
High Point Shoulder (HPS)
High Point Shoulder (HPS) is a critical measurement when utilizing a body measurement chart PDF for accurate pattern fitting. It’s the point at the very top of your shoulder‚ where a shirt or sleeve seam would naturally fall. Locating HPS correctly is essential for proper garment drape and avoiding issues like gaping necklines or constricted shoulders.
To find HPS‚ feel for the bony prominence where your shoulder meets your neck. It’s not necessarily the edge of your shoulder bone‚ but the highest point. Accurate HPS measurement‚ alongside a reliable PDF chart‚ ensures the shoulder seam of your garment sits correctly.
Incorrect HPS placement can significantly impact the overall fit. Always double-check this measurement and compare it to the pattern’s specifications before cutting fabric‚ especially when working with downloaded PDF patterns.
Waistline Placement
Waistline placement is crucial for garment fit and is accurately determined using a body measurement chart PDF. It’s not always simply where you naturally bend! Locate your natural waistline – typically the narrowest part of your torso‚ or where you bend sideways; However‚ pattern waistlines often differ.
A PDF chart will guide you to measure around your torso at the level the pattern intends. This might be slightly above or below your natural waist. Consistent placement is key; use the same method each time. Consider wearing similar undergarments during measurement for accuracy.
Understanding where the pattern’s waistline falls relative to your natural waist is vital for adjustments. A PDF chart provides the baseline‚ but you may need to lengthen or shorten the torso for a perfect fit.

Finding and Using PDF Charts
Numerous websites offer free printable PDF body measurement charts‚ simplifying the process of obtaining accurate dimensions for sewing projects and pattern selection.
Where to Find Free Printable PDF Charts
Locating reliable‚ free printable PDF body measurement charts is surprisingly easy with a quick online search. Several websites specialize in sewing resources and offer downloadable charts in various formats. Popular options include sites dedicated to pattern making‚ sewing tutorials‚ and DIY fashion.
Look for charts that clearly illustrate each measurement point and provide instructions for accurate self-measurement. Pinterest is also a valuable resource‚ often linking to downloadable charts hosted on blogs or individual sewing websites. Ensure the chart is from a reputable source to guarantee accuracy. Many pattern companies also provide basic measurement charts on their websites‚ useful even if you aren’t purchasing their patterns. Remember to always double-check measurements for consistency!
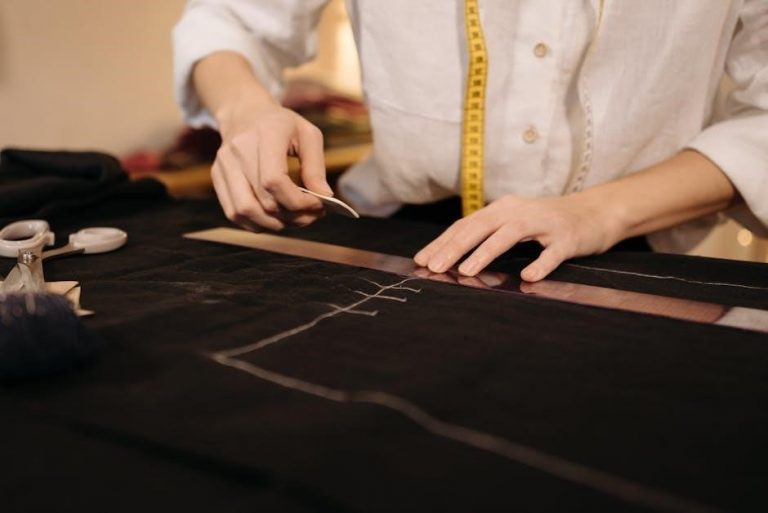
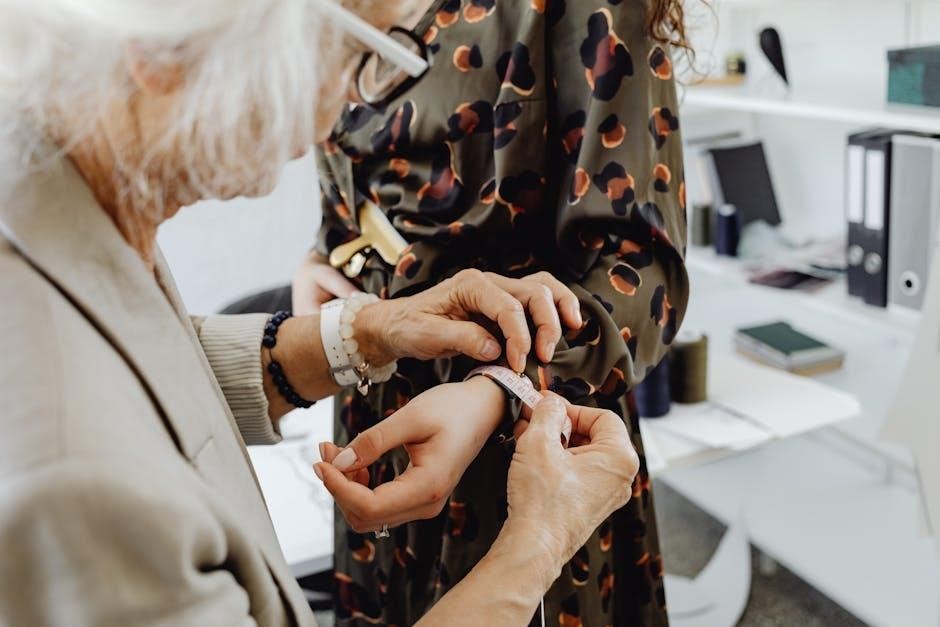
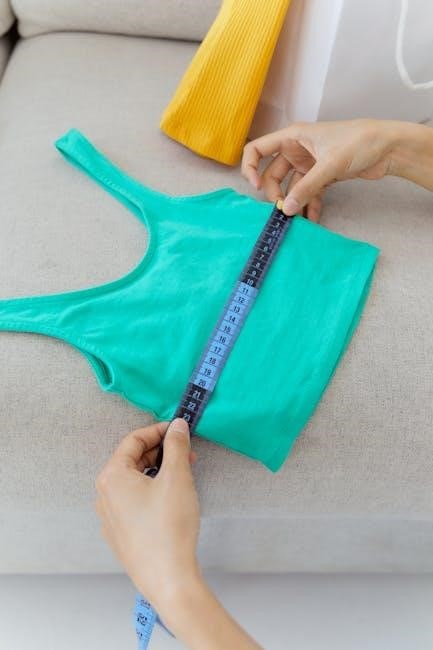
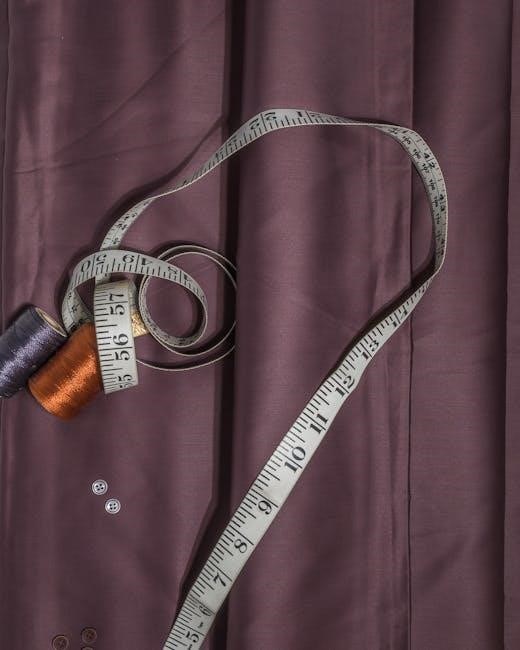
How to Accurately Take Measurements
Achieving precise measurements is crucial when using a body measurement chart for sewing. Wear close-fitting clothing‚ or ideally‚ undergarments only‚ during the process. Stand naturally‚ with good posture‚ and keep the measuring tape comfortably snug – not too tight‚ and not loose.
Enlist help if possible‚ especially for back measurements. Keep the tape measure parallel to the floor for waist and hip measurements. Record all measurements in inches or centimeters‚ and double-check each one. A flexible measuring tape is essential; avoid using metal rulers. Refer to the PDF chart’s illustrations to understand exactly where each measurement should be taken for optimal results.
Tips for Self-Measurement
Self-measurement can be tricky‚ but manageable with these tips! Use a full-length mirror to observe your posture and ensure the measuring tape is level. For bust and waist‚ breathe normally – don’t suck in or puff out your chest. Consider using a hand mirror to check back measurements if you’re alone.
Mark key points like your natural waistline with a piece of ribbon to maintain consistency. Take measurements multiple times and average the results for greater accuracy. Download a printable PDF chart as a visual guide during the process. Don’t hesitate to ask a friend or family member for assistance‚ especially with hard-to-reach areas.

Adapting Charts to Different Body Types
Standard charts are a starting point; adjustments are often needed. PDF charts can be modified to reflect unique proportions‚ ensuring a flattering and comfortable fit for everyone.
Measurements for Petite Figures
Petite figures‚ generally defined as 5’4” and under‚ require specific attention when using a body measurement chart‚ often found as a PDF download. Standard charts may not accurately reflect proportions‚ leading to ill-fitting garments. Key adjustments involve torso length‚ sleeve length‚ and overall garment scaling.
Focus on accurate shoulder-to-bust and waist-to-hip ratios. Petite charts often feature shorter inseam and outseam measurements. Downloadable PDF charts specifically designed for petite frames are invaluable‚ providing a more tailored starting point. Remember to compare your measurements against the chart‚ noting any discrepancies. Adjust pattern pieces accordingly‚ shortening lengths and potentially reducing overall volume to avoid a bulky appearance. Prioritize a well-balanced silhouette.
Consider high-waisted styles to elongate the legs and create a more proportional look. Always test the fit with a muslin before cutting into your final fabric.
Measurements for Plus-Size Figures
Plus-size figures necessitate a nuanced approach when utilizing a body measurement chart‚ readily available as a PDF resource. Standard sizing can be inconsistent‚ making accurate self-measurement crucial. Prioritize bust‚ waist‚ and hip measurements‚ ensuring the tape measure is level and not constricting.
Downloadable PDF charts specifically designed for larger body types offer more accurate starting points. Pay close attention to back width and upper arm circumference‚ as these often require adjustments. Grading patterns up from smaller sizes can sometimes distort the shape; using a dedicated plus-size pattern is preferable.
Consider full bust adjustments (FBA) and swayback adjustments for optimal fit. Don’t rely solely on size numbers; focus on matching your measurements to the chart. Muslin testing is essential to refine the fit before cutting your final fabric.
Adjusting for Different Body Shapes (Apple‚ Pear‚ Hourglass)
A standard body measurement chart (PDF) provides a baseline‚ but recognizing your body shape is vital for a perfect fit. Apple shapes often require adjustments for a fuller bust and midsection‚ potentially needing a graded bust and wider armholes. Pear shapes typically benefit from adjustments to the hip and thigh area‚ often requiring a larger pattern size for the lower body.
Hourglass figures‚ with balanced bust and hip measurements‚ may need adjustments to emphasize the waist. Utilize a PDF chart to compare your measurements and identify discrepancies. Consider princess seams or darts to shape garments effectively.
Pattern alterations should focus on balancing proportions. For example‚ a pear shape might need a flat-pattern adjustment to add width to the shoulders. Always create a muslin to test adjustments before cutting your final fabric.
Using Measurements for Pattern Selection
Pattern sizing varies; don’t rely on ready-to-wear sizes! Compare your body measurement chart (PDF) results to the pattern’s size chart for the best fit and outcome.
Choosing the Right Pattern Size
Selecting the correct pattern size is crucial‚ and it often differs significantly from your standard clothing size. Don’t assume you know your size – always refer to the pattern’s specific size chart. These charts are based on body measurements‚ not arbitrary sizing conventions.
Begin by comparing your body measurements (obtained using a body measurement chart‚ often found as a PDF) to the corresponding measurements listed on the pattern envelope or instructions. Focus on the bust‚ waist‚ and hip measurements as primary indicators.
If your measurements fall between sizes‚ it’s generally recommended to choose the larger size. You can always adjust the pattern down if needed‚ but it’s much harder to add fabric! Consider which part of your body corresponds most closely to the size range; for example‚ if you’re between sizes for your bust but within the smaller size for your hips‚ you might grade between sizes.
Understanding Pattern Sizing Variations
Pattern sizing isn’t standardized across all companies; a size 10 in one brand can fit drastically different than a size 10 in another. This is why relying on a body measurement chart – and comparing it directly to each pattern’s size chart (often available as a PDF) – is paramount.
“Big Four” pattern companies (Simplicity‚ McCall’s‚ Butterick‚ Vogue) often have slightly different sizing philosophies. Independent pattern designers also have their own unique approaches. Always prioritize the pattern’s measurements over your usual size.
Furthermore‚ patterns are often drafted for a specific body type. Some assume a “B” cup bust‚ while others are designed for straighter figures. Recognizing these assumptions‚ and using your body measurement chart to adjust accordingly‚ is key to a good fit. Don’t be afraid to blend sizes!
Making Adjustments to Patterns Based on Measurements
Once you’ve compared your body measurement chart to the pattern’s size chart (often found as a PDF download)‚ discrepancies are inevitable. These differences aren’t failures; they’re opportunities for customization! Common adjustments include lengthening or shortening patterns‚ grading between sizes‚ and performing bust or waist adjustments.
Shoulder slope‚ back width‚ and hip shape are areas frequently needing alteration. Use your measurements to identify where the pattern deviates from your body. Transfer these adjustments carefully onto the pattern pieces before cutting your fabric.
Muslin mock-ups (toiles) are invaluable for testing adjustments. Sewing a test garment allows you to refine the fit before committing to your final fabric. Remember‚ a well-fitted garment starts with accurate measurements and thoughtful pattern adjustments!
Advanced Considerations
Beyond basic charts (often PDF downloads)‚ explore dress form measurement techniques and digital tools for precise body mapping and custom pattern creation.
Taking Measurements with a Dress Form
Utilizing a dress form‚ ideally one closely matching your size‚ offers a remarkably accurate method for determining sewing measurements‚ supplementing standard PDF body measurement charts. Begin by ensuring the dress form is properly adjusted to your measurements – padding can be added or removed to achieve a close fit.
Instead of self-measurement‚ which can be prone to errors‚ drape muslin fabric directly onto the form. Pin the muslin smoothly‚ following your body’s natural curves. Then‚ measure directly on the form through the muslin. This technique accurately captures your unique shape‚ including shoulder slope‚ back width‚ and torso length.
Remember to maintain consistent tension on the measuring tape and take multiple readings to ensure accuracy. This method is particularly valuable for complex designs or when adapting patterns.
Digital Body Measurement Tools
Modern technology offers innovative alternatives to traditional measuring tapes and PDF body measurement charts. Smartphone apps utilizing augmented reality (AR) can now scan your body and generate a detailed measurement profile with impressive accuracy. These tools often provide 3D visualizations‚ aiding in understanding your body shape.
Several apps guide you through the scanning process‚ requiring minimal assistance. While results should always be cross-referenced with manual measurements for verification‚ they offer convenience and reduce the need for a helper. Some platforms even integrate directly with pattern companies‚ suggesting appropriate sizes.
Consider factors like lighting and clothing when using these tools. Loose garments can skew results‚ so form-fitting attire is recommended. Digital tools are evolving rapidly‚ becoming increasingly reliable resources for sewists.
Creating Custom Measurement Charts
Beyond utilizing pre-made PDF body measurement charts‚ experienced sewists often benefit from crafting personalized charts. This involves meticulously tracking measurements across multiple projects‚ noting adjustments made to patterns for optimal fit. A custom chart becomes a valuable record of your unique body and sewing preferences.
Begin by consistently recording all measurements – bust‚ waist‚ hips‚ and more – before each project. Document any alterations made to the pattern pieces‚ such as lengthening or shortening sleeves‚ or adjusting the waistline. Over time‚ patterns emerge revealing consistent fitting issues.
A well-maintained custom chart streamlines future projects‚ reducing fitting frustrations and improving garment outcomes. Consider using a spreadsheet or dedicated sewing journal for organized record-keeping.